Space
The Space tab shapes the room: its size, its doors, its elevator, its windows, and the blocks that stand in it. What lies outside the building is on the Outside tab; see Outside.
The Plan
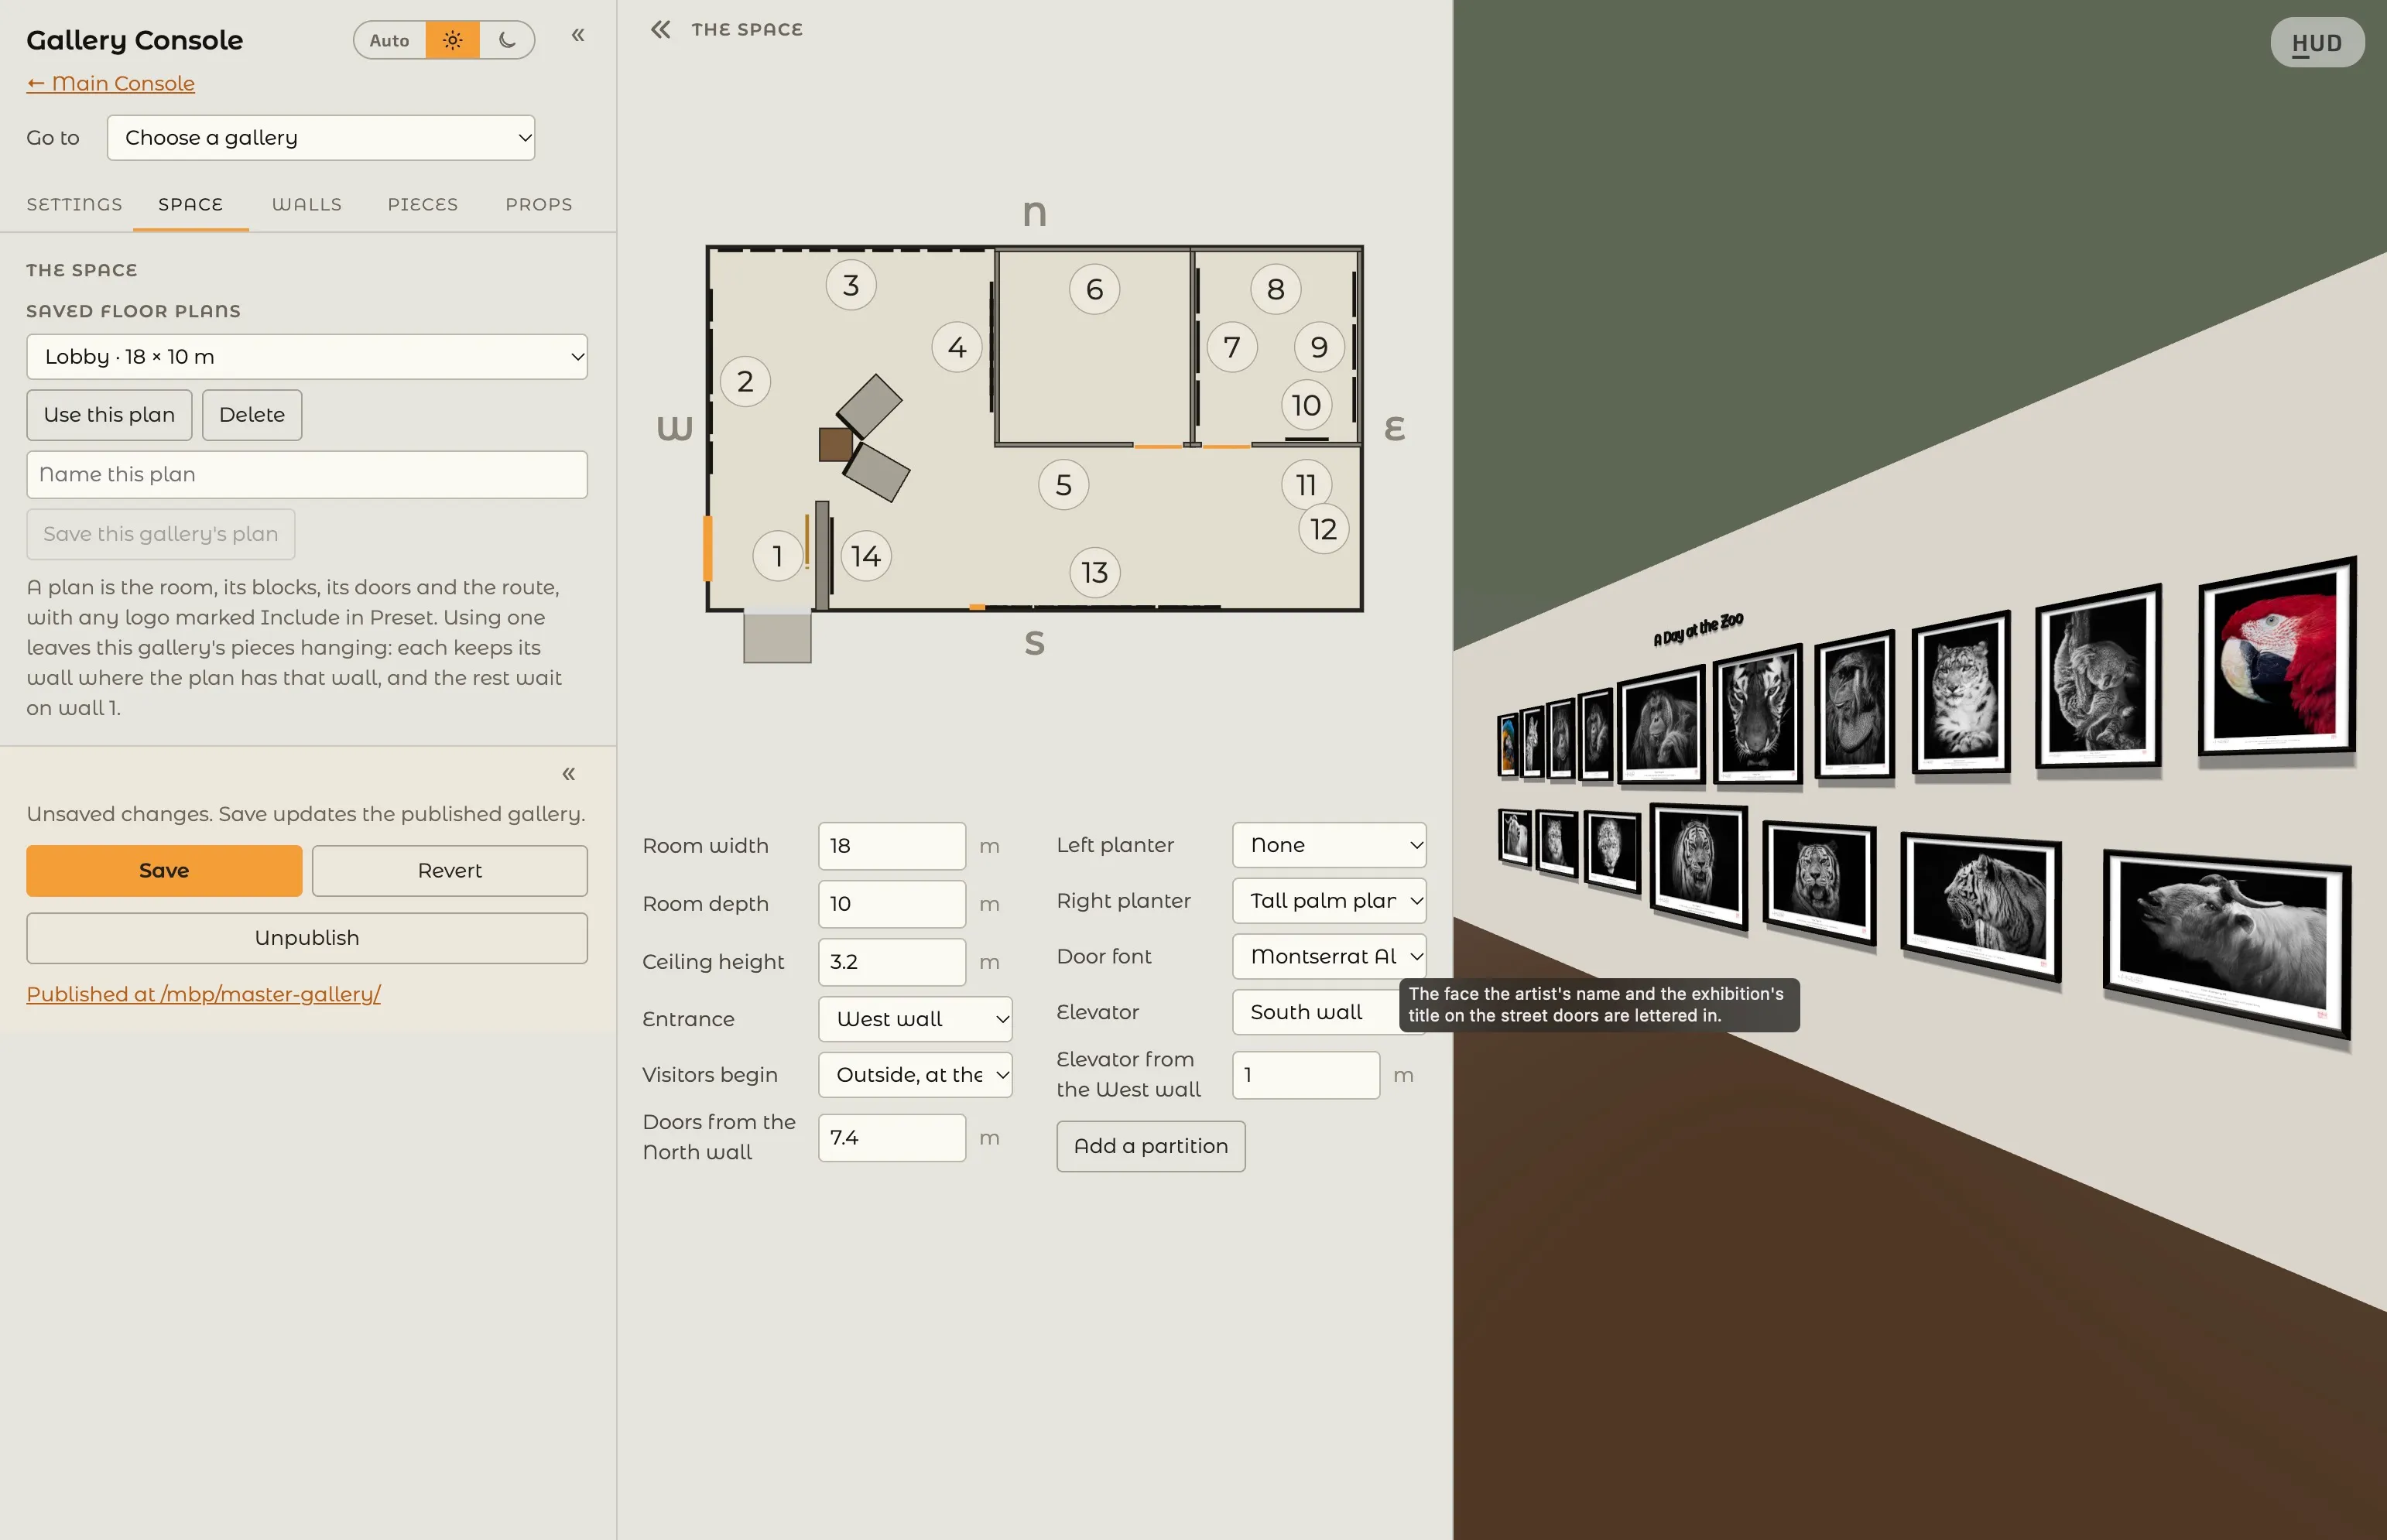
Section titled “The Plan”The plan shows the room from above, with north at the top. Each wall that takes pieces carries its number in the route. Where walls stand close together, as between partitions a step apart, their numbers move apart along their walls so that each can be read, the lower number above or to the left. Wall separators show as short strokes on their walls. » shows the plan large, beside the Console, and « puts it back.
- Press a wall’s number to walk to the first piece on that wall.
- Drag a block or a prop to move it.
The Room
Section titled “The Room”Room width, Room depth, and Ceiling height set the room’s size, in meters.
The Entrance
Section titled “The Entrance”- Entrance: the wall the street doors are in, or None. Without an entrance there is no outside: visitors begin inside, or arrive by the elevator.
- Visitors begin: Outside, at the doors; Inside, looking into the room; or Inside, at the first piece.
- Doors from the West wall (or from the North wall, for doors in an east or west wall): where the doors stand along their wall.
- Door font: the lettering of your name and the exhibition’s title on the doors: Helvetica and Georgia (your name in Helvetica, the title in Georgia), or both in Montserrat Alternates, Exo 2, Georgia, or Helvetica.
The door font is available only while the Gallery has doors.
The Elevator
Section titled “The Elevator”Elevator puts the elevator in one of the room’s walls, and Elevator from the West wall (or North wall), directly below it, places it along that wall, measured to the elevator’s nearer edge. A Gallery needs an elevator to be a floor of your building, though the elevators don’t have to be in the same place on every floor: they can move sideways, and around corners.
Windows
Section titled “Windows”Add a window puts a window of the type you choose in the wall you choose, and you can add up to twelve. There are two types:
- Small window: a traditional window with square panes, 1.3 m wide and 1.2 m tall, set in the thickness of the wall. It suits a small room.
- Bay window: 2.4 m wide and 1.6 m tall, its flat frame against the inside of the wall and its three panes of glass standing out from the building, with a deep sill inside.
For each window, Type changes its type, Wall is the wall it is in, From the wall’s left end places it along that wall, seen from inside the room, and Sill height sets how high its bottom edge is above the floor. Remove window takes it away. With the console open, pressing a window in the Gallery shows its settings.
A window stays clear of the doors, the elevator, and your other windows, moving aside if one of them is placed where it stands. Nothing hangs across a window, so adding one divides its wall in two, as the doors do: the pieces on that wall close up to either side of it, and the walls are numbered again. A window looks out on its wall’s outside view; see Outside Views. It does not change the lighting in the Gallery, so your work is lit the same with or without one.
On a floor above the ground floor, the ground outside a window is set below by half the height of the floors beneath it, so visitors look down on the view rather than out at street level. Each floor’s height is its ceiling height and a little for the floor above it. Half the height looks more real than the whole, since the views are photographs taken from the ground. A floor with street doors stands in the street, so its ground is at its own level.
Partitions, Blocks, and Rooms
Section titled “Partitions, Blocks, and Rooms”Add a partition stands a thin wall in the room. Below the button, every partition, block, and room in the Gallery is listed by name. Choose one in the list, or press it on the plan, to show its settings. Its name, Turn, and Delete then show directly below the plan; Turn turns it a quarter. Drag it on the plan, or set it exactly:
- North width and West width: its size.
- Height: a partition may stop short of the ceiling.
- From the West wall and From the North wall: its position.
To take one away, choose Delete below the plan, or beside it in the list. The Console asks first. Its labels, separators, and wall colors go with it, and any pieces hung on it go back among your other pieces. Revert puts it back until you save.
A block is simply a thicker partition. Against a wall or into a corner, a thick block turns the room into an L, a U, or a ring.
Naming a Block
Section titled “Naming a Block”A new block is called Block 1, Block 2, and so on. To give it a name of your own, such as Video Room:
- Select the block on the plan.
- Press the pen beside its name, or double-press the name.
- Type the name, up to 40 characters, and press Enter or click away. Esc cancels. An empty name returns the block to its number.
The name is used wherever the block’s walls are named, such as “Video Room, south side” on the Walls tab. Save to keep it.
Making a Block a Room
Section titled “Making a Block a Room”Tick Make it a room, with a door to hollow the block into a room of its own, with a sliding door that opens for anyone who comes near and turns toward it, within about 45 degrees of facing it, so that walking past it looking ahead leaves it shut. Once open, it stays open until the visitor moves away. The guided tour opens the doors it comes to. From inside a room with a video wall, the door waits until the visitor is close to it, so that walking about the room or taking a seat does not open it.
- Door in the: the side the door is in, and its position, measured from the left as seen from outside.
- Door opens: To the left or To the right, as seen from outside. The door slides into the wall on that side. When two rooms stand side by side with their doors close together, make each door open away from the other, so that neither slides across its neighbour’s doorway.
- The room can have its own colors.
- Red chairs, Black chairs, and the other colors: chairs in rows, with a way kept clear from the door to the front row, at least as wide as the door. With the door toward the right, the chairs stand on the left, filled from the left-hand wall, and the right is kept clear; with the door toward the left, the other way round. With the door in the middle, the chairs stand either side of an aisle down the middle. With the door in a side wall, an aisle runs along that wall. Each row holds as many chairs as the room’s width allows, and the room as many rows as it is deep enough for. When the room is full, the note says so, for example “The room is full at 6 chairs.”
- Chairs face: The screen, or one of the room’s walls.
A room with a video wall becomes a video room; see Video.
Floor Plans
Section titled “Floor Plans”A floor plan is the room, its blocks, its doors, and the route, with any logo marked Include in Preset. Save a Gallery’s plan under a name, and use it for another Gallery. Using a plan leaves the Gallery’s pieces hanging: each keeps its wall where the plan has that wall, and the rest wait on wall 1.