Walls
The Walls tab holds the route: the order the guided tour, and the < > keys, visit the walls.
The Route
Section titled “The Route”Each wall that takes pieces has a number, shown on the plan and in the list. The tour visits the walls in the order of their numbers. Beside each wall:
- ↑ ↓ move it earlier or later in the route, which renumbers the walls.
- Room’s color, or one of the wall colors, paints that wall a color of its own. The rest of the room keeps the Room color on the Settings tab. A black label on a wall painted dark gray is shown in white.
- The eye hides the wall from the route. A hidden wall takes no pieces, and any pieces on it go back among your other pieces. Hidden walls are listed below the route, where you can show them again. The wall itself still stands; to take a partition or a room away, delete it (see Partitions, Blocks, and Rooms).
- ⇄ reverses the wall: its pieces are hung and walked from the right instead of the left.
Defining the Route on the Plan
Section titled “Defining the Route on the Plan”With more than a room or two, it is easiest to choose the route on the plan.
- On the Walls tab, choose Define route. The plan opens large, and the button flashes and reads Store Route.
- Press the walls’ numbers on the plan in the order the tour should take. The first wall not yet chosen flashes as a suggestion; you can start with it or with any other.
- Each wall you press takes the next number at once and is filled in teal, and the list follows.
- To change your mind, press the last wall you chose again, and it is taken back.
- When you have chosen every wall, the route is stored and the button returns to Define route.
- To finish before choosing every wall, press Store Route. You are asked whether to hide the walls you have not chosen: OK hides them and stores the route, and Cancel lets you go on choosing.
- Save to keep the route.
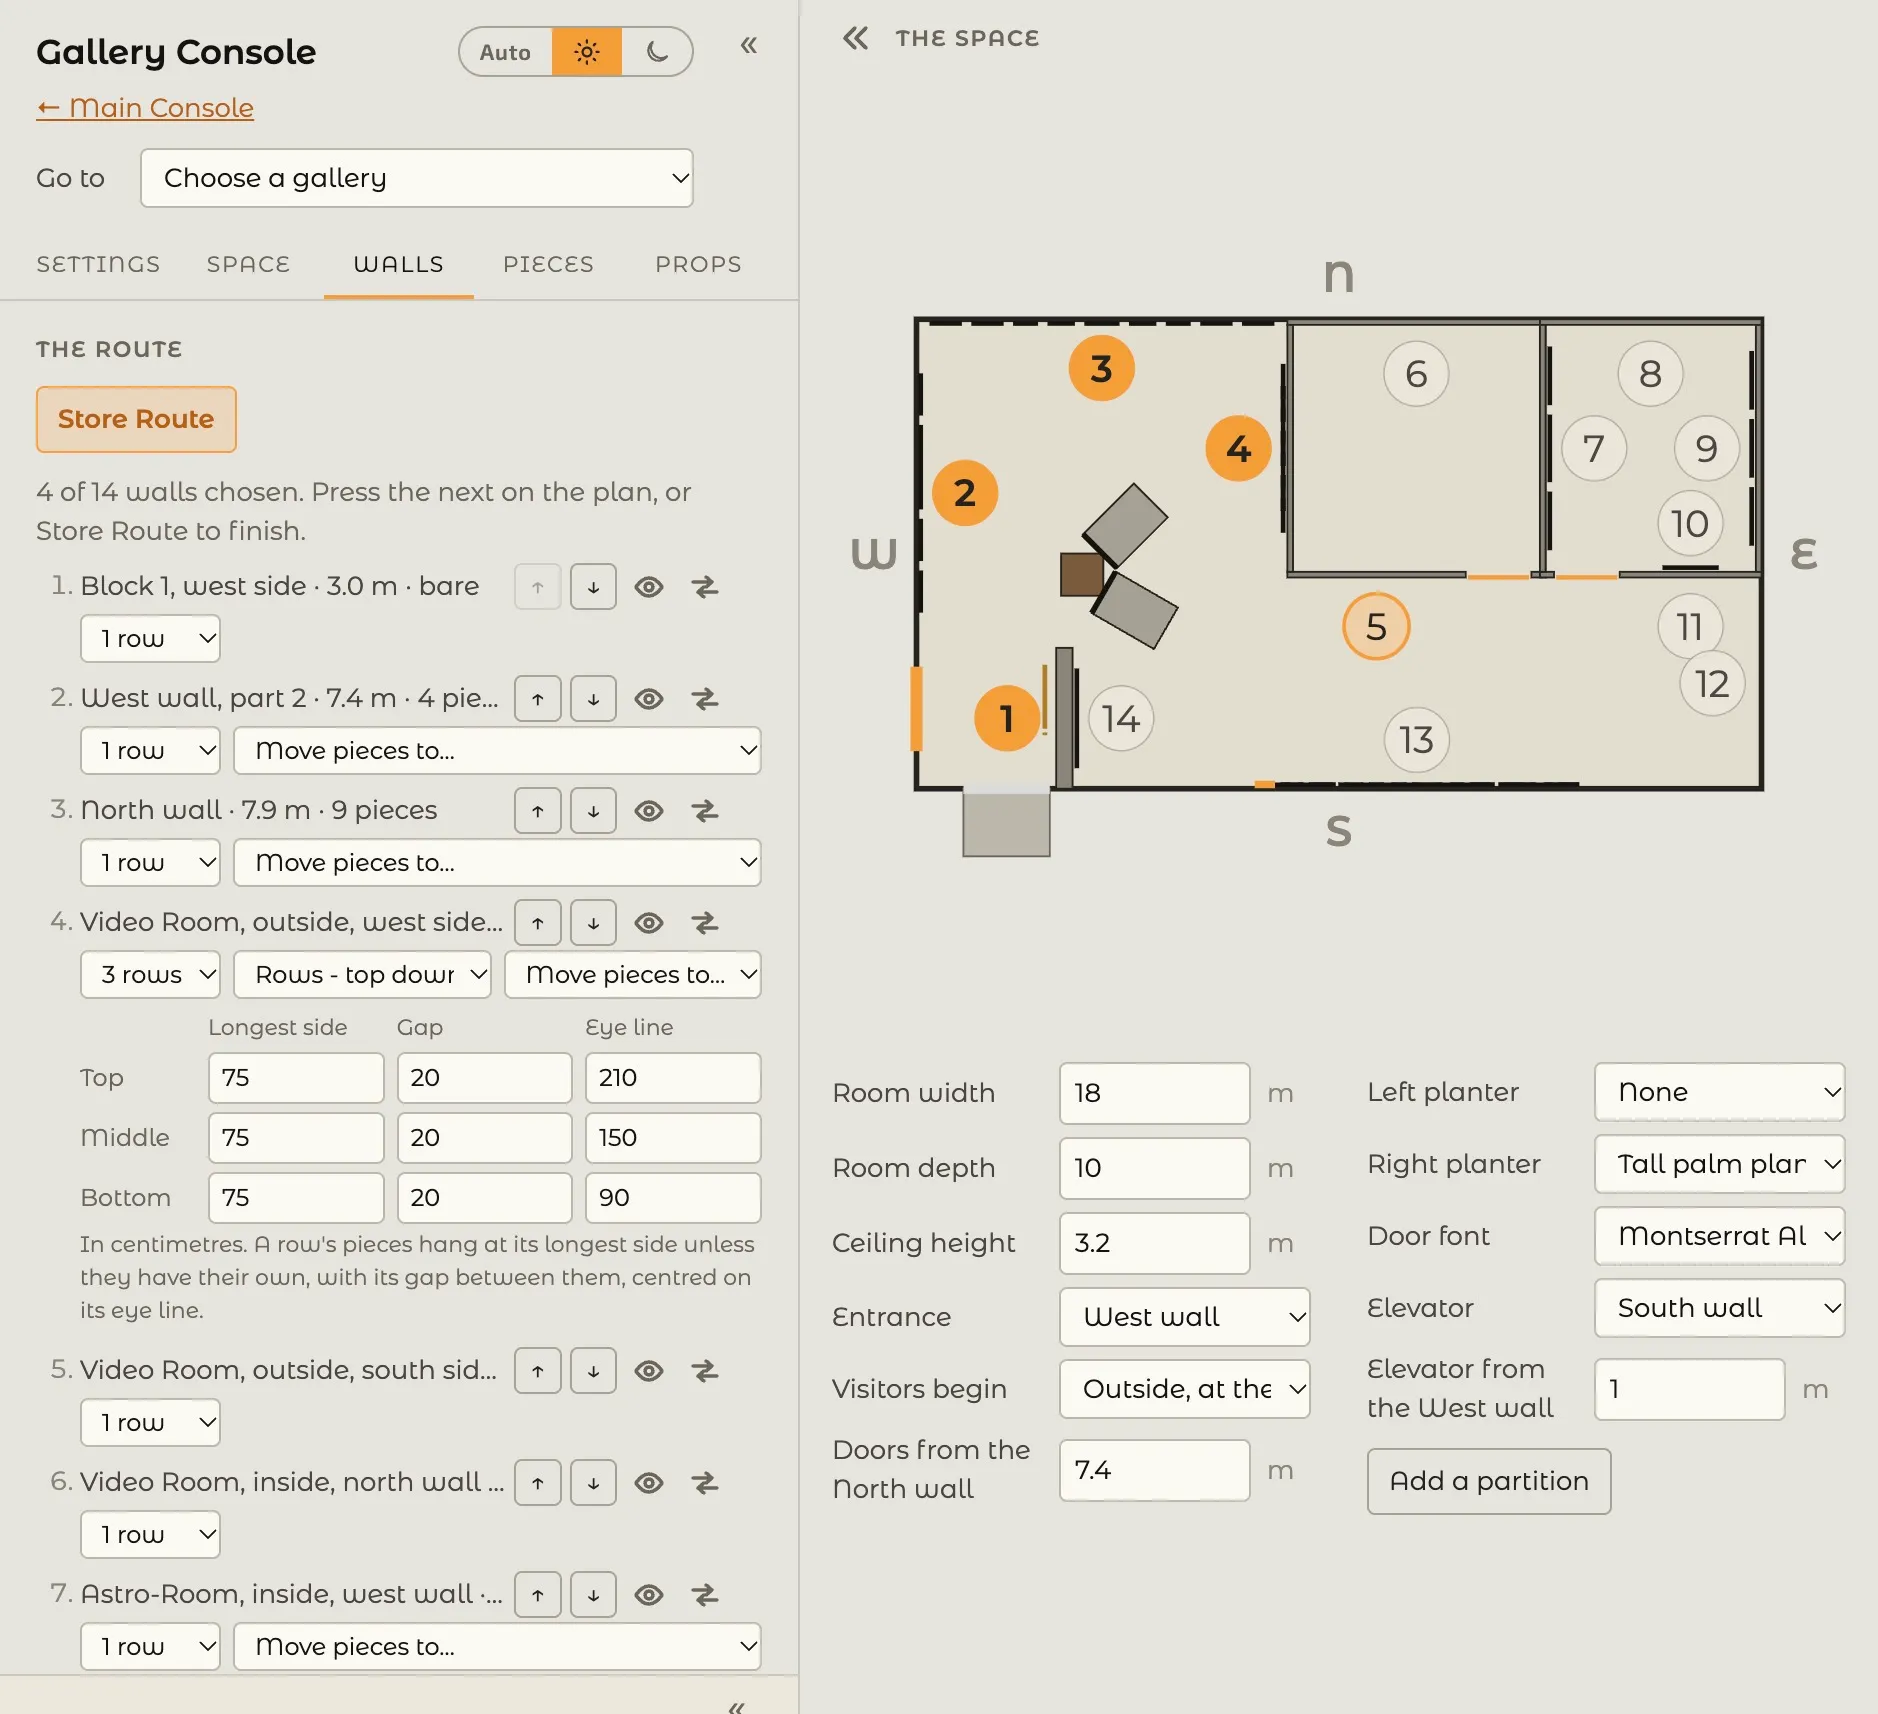
A wall can hold 1 row, 2 rows, or 3 rows of pieces, chosen beside the wall in the route.
A wall with more than one row has an Auto-view Pattern, the order the guided tour and the < > keys go through its pieces:
- Columns - top down and Columns - bottom up
- Rows - top down unidirectional and Rows - top down bidirectional
- Rows - bottom up unidirectional and Rows - bottom up bidirectional
A reversed wall reverses the pattern along the wall.
Each row has its own settings, in a table beneath the wall: Longest side, Gap, and Eye line, in centimeters. A row’s pieces hang at its longest side unless they have a size of their own, with its gap between them, centered on its eye line. A wall of one row uses the Global Wall Settings on the Pieces tab.
Moving a Wall’s Pieces to Another Wall
Section titled “Moving a Wall’s Pieces to Another Wall”Everything on a wall can move to a bare wall, laid out as it is: the pieces in their order, each in its row and at its own size, with the wall’s rows, its Auto-view Pattern, each row’s settings, and the direction it is hung. The wall left behind becomes a plain wall of one row. Wall labels and logos stay where they are.
On the Walls tab:
- Find the wall in the route. A wall with pieces has Move pieces to….
- Choose the bare wall to move them to.
In the Gallery, with the console open:
- Hold Ctrl and Shift (on a Mac, Cmd and Shift) and press the wall. The HUD says how many pieces are held.
- Press the bare wall to move them to. Esc, or a press on the same wall, lets go without moving anything.
Pieces only move to a bare wall, and never to a video wall. Save to keep the change.